08 Jan 2024
robots
ros2
While I sported a Linux laptop throughout grad school, my Willow Garage days,
and my early startup years, I’ve been using a Macbook Pro as my daily driver
for about a decade now.
That equates to a lot of “ROS on Mac” pain.
Things were supposed to get easier with ROS 2.
Back in 2020, I installed ROS 2 natively on my last Intel-based Macbook.
You can read all about the
fun of compiling from source.
Then Apple moved to their new M1 architecture, ROS downgraded OSX to Tier 3
support, and I got older and maybe a bit more grumpy. For all of these reasons,
I decided not to do a native installation for ROS 2 Humble. I tried out a few
approaches as documented here, but
ended up settling on using a Parallels VM.
Yes, Parallels costs cash money. But, how do you value your time?
Parallels Installation
My original post had a quick run down of my installation, but here is a recap:
Issue: RVIZ2
rviz2 runs well inside the Parallels VM, especially if you avoid
using “points” as the display type for laser scan and point cloud messages. There
seems to be a bug there that causes frequent crashes - but only for that display type.
I’ve had great success with Flat Squares as the rendering type. I’ve also had no
issue visualizing points in a visualization_msgs/Marker.
Issue: Bridged Networks
If you just want to develop locally within your VM, then you can keep right on
using the “Shared Network” profile and skip over this issue.
However, if you want to connect to a robot and actually stream data from ROS 2,
you will need to change from “Shared Network” to “Bridged Network”. This sounds
easy, however, it appears there are numerous issues with Parallels creating
bridged networks (their support forum was a wasteland of these issues, all unanswered).
I could not get the default network to even come up with a bridged configuration.
The workaround appears to be to create a second network adapter, and make that
one bridged. Since the primary network is still shared and comes up as expected,
your Ubuntu VM will boot, and then you can configure the bridged network within
the VM. I found that using a fixed IP was the most reliable approach:
- Shut down the VM
- In the Parallels Configuration screen, add an additional network adapter,
and select “Bridged Network”, and the appropriate adapter on the Mac.
- Boot the VM
- I configured the network adapter with a fixed IP and then started up:
 sudo ip addr add 192.168.0.150/24 dev enp0s6
 sudo ip link set dev enp0s6 up
Issue: Disk Size
About a year later, I started to run out of disk space. I had created the VM
with a 64GB drive in the Parallels configuration, but inside the VM it only
reported a 32GB drive. Apparently, this is a side effect of using the server
installation of Ubuntu - the drive won’t automatically be fully sized. The
good news here is that we don’t need to use tools like gparted as we
are only adjusting the logical partition. I got my other 30GB with:
sudo lvresize —resizes —size +30G ubuntu-vg/ubuntu-lv
Summary
This is a pretty short post - because things are mostly working. I’ve been using
this setup over the past few weeks to connect RVIZ to my RoboMagellan robot while
it is navigating around outdoors. I’ll have some RoboMagellan-specific posts coming
up soon.
22 Nov 2023
trinity-fire-fighting
robots
ros2
slam
Earlier this year I built a small robot for the RoboGames tablebot competition.
You can read about that robot
in my previous post.
I’ve now decided to update that robot for Robogames 2024, and also have the robot
tackle the fire fighting competition.
Hardware Upgrades
I competed in this fire fighting competition
about a decade ago, using a robot
with just an 8-bit AVR microcontroller for a brain and a bunch of dedicated
sensors. This time around, I’m going to leverage ROS 2, Navigation2, and
a thermal camera.
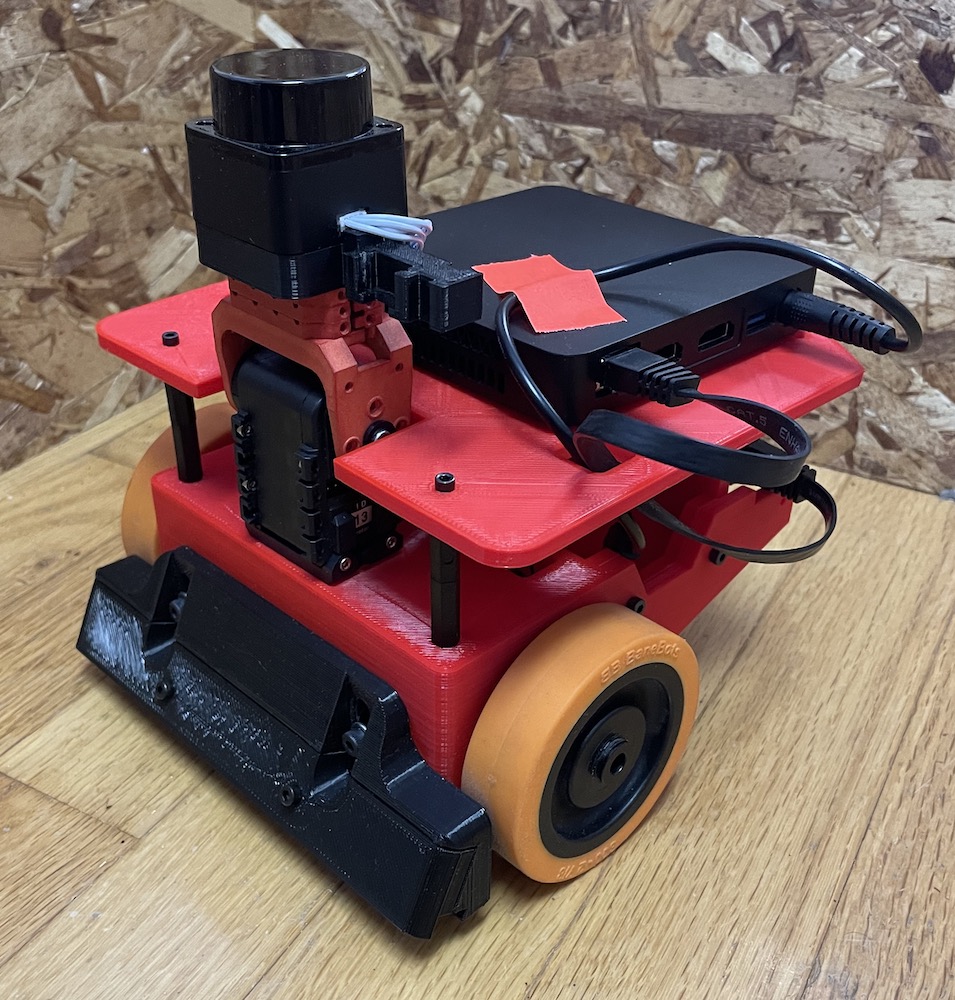
To accomplish this, I’m using a low-power Celeron-based computer. It’s smaller
and lower power than any of the NUC computers I’ve used before and runs right
off 12v. I added a second battery to support the computer.
I 3D-printed an entirely new chassis for the robot, in fire engine red.
The neck assembly contain the LD-06 lidar, and will soon have the thermal camera
and a fan to extinguish the candle:
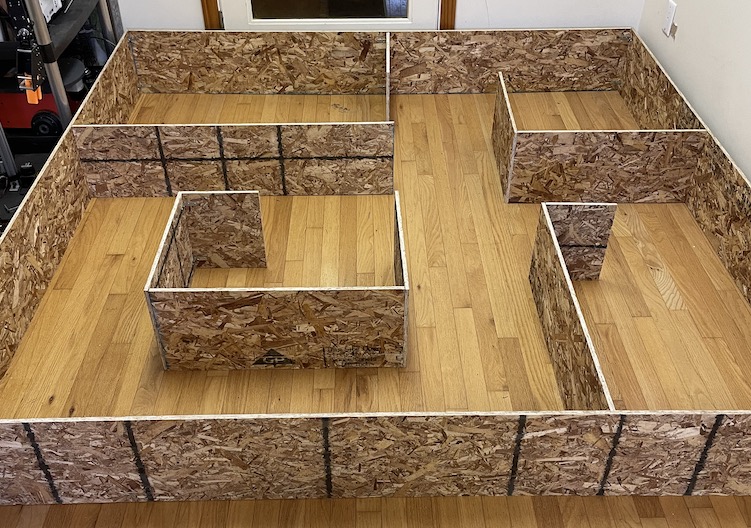
I also built a mock up of the arena. I didn’t quite have an 8’x8’ area for the arena,
so I scaled everything to 7’x7’. In the real competition the hallways will be 2” wider,
so I expect that navigation will work better in the real thing.
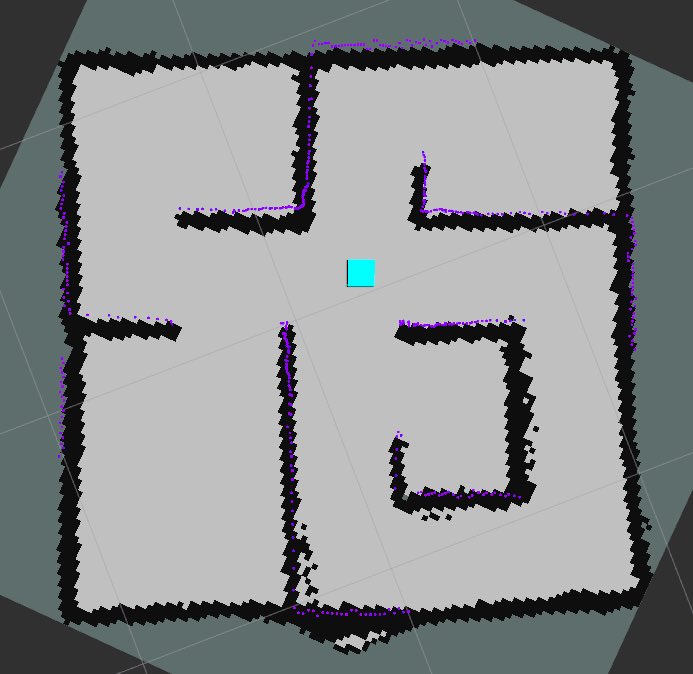
Step 1: Build a Map
The first step once the robot was mostly assembled was to build a map. The standard
approach in ROS 2 is to use
slam_toolbox.
Normally, this works pretty much out of the box. But the default parameters are
all tuned for full size buildings, and my entire arena is about the same width
as a typical hallway.
First change was to reduce the resolution of the map. I initially tried to map
with a 1 centimeter grid, however this seemed to cause issues because there is
a decent amount of noise in the low cost laser scanner I am using. A grid scale
of 2 centimeters caused the scan matcher to perform significantly better without
overly risking the map narrowing the hallways and doorways.
With the scan matcher now working, I began to map - but the map consistently exploded
about half way through. I pulled up the visualization of the pose graph in RVIZ, and
realized that we were getting false loop closures everywhere. The default loop
closure search size is 2.0 meters - that’s as big as the whole arena. Turning
this way down allowed the map to complete mostly intact.
Step 2: Localization
With a map in hand, attention is turned towards localization. There are a number
of parameters to tune here, and so visualization is a needed tool. Nav2 uses a
new, custom message for publishing the particle filter poses - so it is important
to install the nav2_rviz_plugins package.
With the particle filter poses visualized, I set about making a few changes:
- Since the map is so small, and the robot moves so slowly compared to a full
size robot, I reduced the
update_min_d parameter so that
localization will be updated frequently enough.
- I drastically reduced the
alpha parameters for the motion model.
Since the robot is quite small, the errors are also quite small. To get
good values for the alpha parameters, I basically tweak the
settings until the particle cloud diverges just the right amount - not too
much, but not too little either. I’ve frequently seen people tune the
parameters to be too tight, leading to a lack of particle diversity, which
can cause the cloud to converge to an incorrect value and never get back
to the correct pose.
- Since we are using the likelihood model, only two parameters are used for
the probabilistic model:
z_hit and z_rand. Since
the environment won’t change during the competition, and there are pretty
much no unknown obstacles, these can be set quite aggressively.
z_hit is set to 0.98, and z_rand is 0.02 - this
basically encodes that there is a 2% chance of a measurement that is not
based on something in the map.
At this point, localization was somewhat working, but not entirely reliable.
Starting to dig into the scoring a bit more, I reduced the value of
laser_likelihood_max_dist thinking that would make a big difference
since the default is 0.2 meters and my hallways are only about 0.35 meters wide.
But this had negligible effect. In reviewing the classic blue book (Probabilistic
Robotics by Thrun, Burgard and Fox), I noticed that I wasn’t actually changing
the correct parameter. sigma_hit was what really needed adjustment
since it controls how fast the probability drops off. Dropping this from
0.2 to 0.025 made a huge improvement in localization.
A few random remarks:
- In reviewing the blue book I noticed that pretty much every implementation
of AMCL out there (and there are now several) don’t treat unknown space
outside of the map the way the book does. Every implementation propagates
the Gaussian values in both directions from the wall, rather than only going
into the free space that was raytraced during the map building phase. It
would seem that in some environments, this change could actually help with
localization accuracy.
- In working with such close range data, I started to wonder if maybe there
should be some accounting for how long the range measurement is when computing
the probabilities. Most of the lasers on the market today specify the error
as a percentage of the range measured, and all of them have worse accuracy
for longer range measurements.
Step 3: Navigation
The next step is to fire up Navigation2. I setup
my config and launch files as a copy of the configuration that I used for the
UBR-1 robot navigation and then
started adjusting for the application:
- I reduced the costmap size to 0.02 meters to match the map, tightened the
goal tolerances, and defined a square-ish footprint for the robot.
- For my local controller, I set the appropriate velocity and acceleration
limits and drastically reduced the lookahead distances.
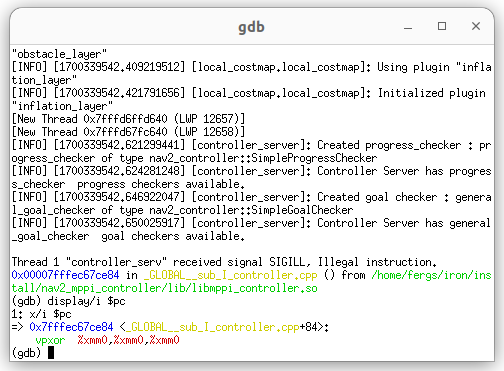
I was not getting the results I wanted at first with the GracefulController,
so I tried switching to the new MPPI controller. However, that turned out to
not be so easy. The MPPI controller is heavily optimized with vectorization/SIMD
instructions - but - I’m on a fairly low power Celeron processor that doesn’t
support many of the newer SSE / AVX instructions. I tried to build from source
and deactivate these optimizations, but kept running into an illegal instructions
and eventually returned to tuning the controller I know.
I will note that the Navigation2 documentation has some
great documentation
on debugging in complex ROS 2 projects. These notes allowed me to launch the
controller server in an xterm window, attached to gdb, and see exactly what
illegal instruction I was hitting:
Next Steps
That is pretty much where this project is at right now. I’ve got semi-reliable
navigation that isn’t entirely fast yet - but that’s not bad for just a few hours
of work. I’m going to continue tuning the navigation while also getting the higher
level controls worked out for the robot to complete the fire fighting task.
24 Oct 2023
robots
roscon
ros2
One of the benefits of being on sabbatical is that I don’t have to rush back to work
after ROSCon - and so I can sit around and write up some thoughts and themes
from the show.
Don’t expect me to tell you what the best talks were - I didn’t actually attend any talks.
You are not alone if that seems strange to you, my reasoning is that all the talks get
recorded and will be posted in a week or two but walking around talking with people can
only be done in person.
Getting New Contributors into Open Source Robotics Software
On the Tuesday prior to ROSCon, PickNik Robotics hosted MoveItCon with more than fifty
community members in attendance. The most interesting takeaway came from the opening
presentation slides:
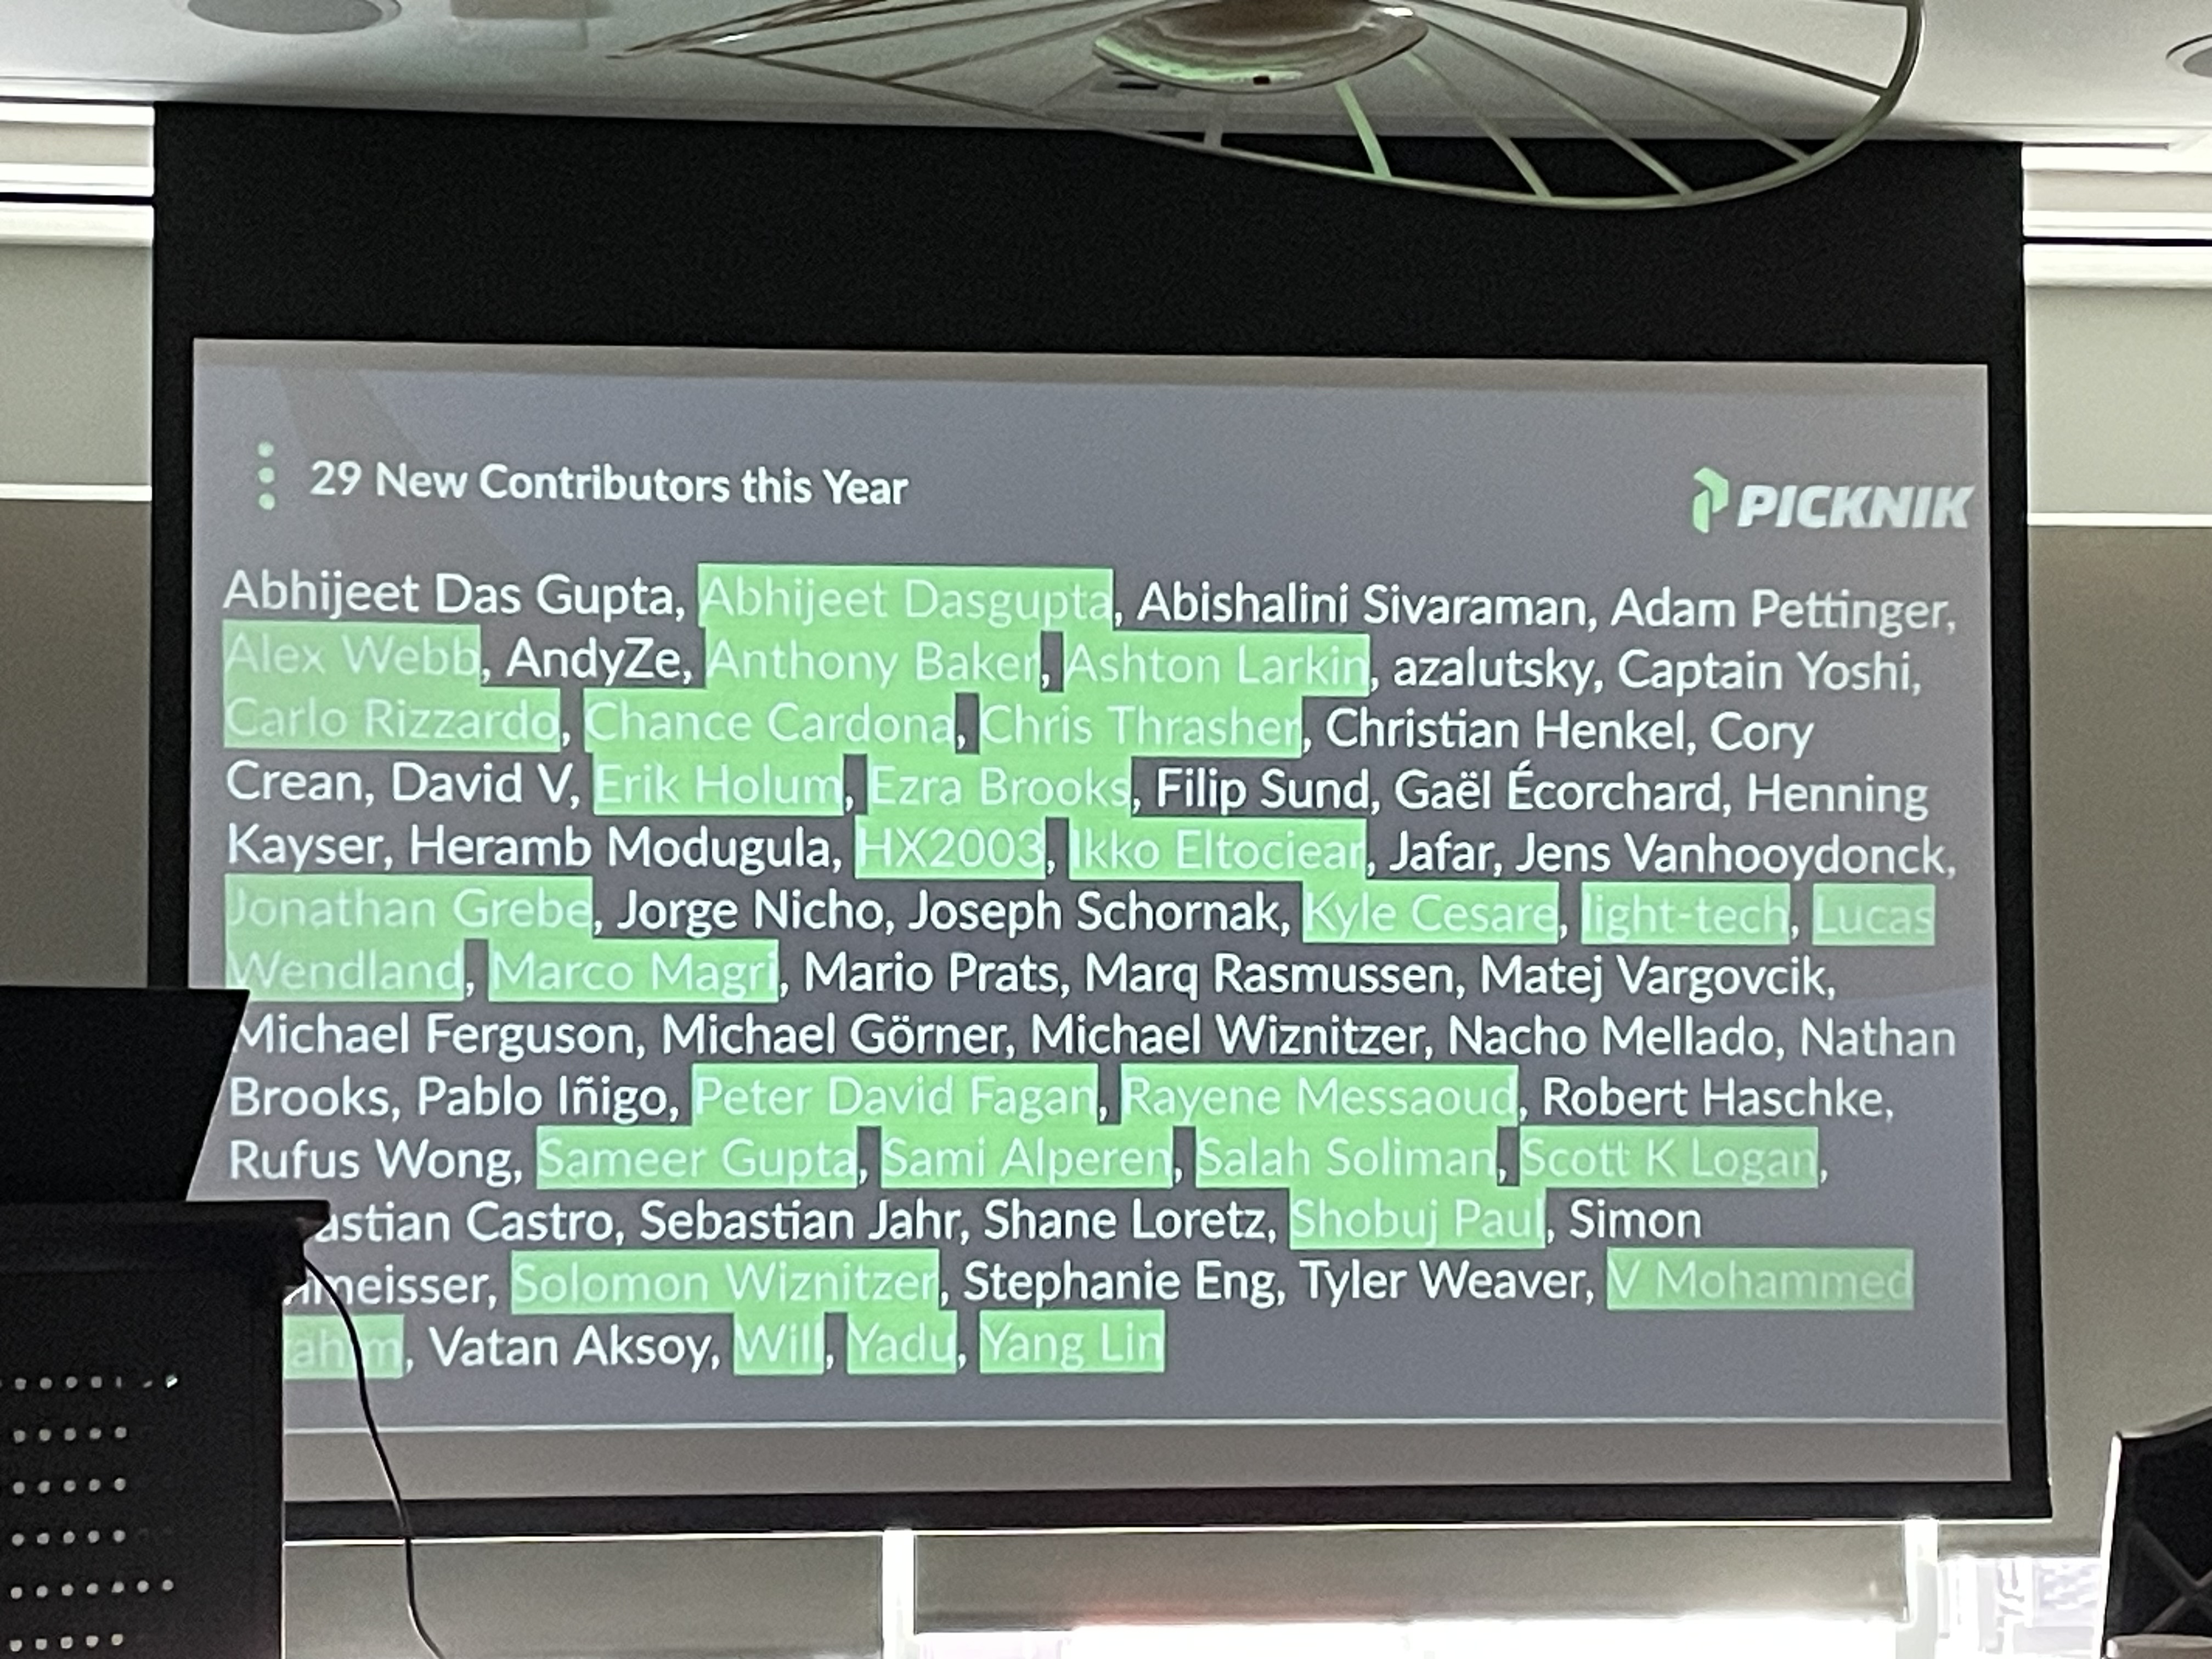
Over the past year, 29 of 66 contributors to MoveIt2 were FIRST TIME contributors.
This stands in stark contrast to many of the more core ROS packages. I had
numerous discussions at both MoveItCon and ROSCon about why MoveIt2 has been so
successful in luring new contributors. The consensus was really around how little
friction new contributors encounter.
MoveIt2 has a large group of very active maintainers - who especially take the
time to help new contributors run through the gauntlet they might encounter. There are
a number of maintainer strategies at play for MoveIt2, but here are a few you could apply
to your own projects:
- Actively maintain the list of tickets/issues on a project, culling out of date ones.
- Instead of spending time tackling some of the easier issues, tag them “Good First Issue”
and then spend that time to help a new contributor to solve the bug or implement
a new feature.
- Respond quickly to new PRs. Make sure feedback is constructive.
- Have great documentation, especially around how to setup the development environment.
- Be a cool/glamorous project. Ok, this is a bit harder for some of the essential open
source packages - but it is hard to deny that MoveIt2 and Nav2 aren’t both benefitting
at least a bit from this glamour.
During the closing at ROSCon, the audience was asked to raise their hand if this was their
first year at ROSCon - and I would say a majority of hands went up. I’m sure some of them
might be long time users or developers of ROS - but I wonder how many more of those people
we could help to contribute to ROS over the next year?
The Kids Are, Well, No Longer Kids
There have been 12 ROSCon/ROSWorld events. The folks that have been there from the beginning
are getting a bit older. We don’t stay out as late after the conference, and some of us
have likely forgotten what it was like just starting out in ROS or robotics. If you have
been around in ROS and robotics for a while, here’s some ideas for you:
- Mentor some junior engineers. Connect them to people working on similar problems.
Point them at all that documentation you wrote years ago - you wrote documentation,
didn’t you?
- You don’t have to just write code - review some code. Help junior developers get
their contributions merged.
- Don’t burn out - take care of yourself physically and mentally - there were more than
a few people I talked to who aren’t actually as old as they feel - but much of robotics
is still taking place in fast-paced startups, and they can take a toll on you…
I certainly wish I had better paid attention to that last point when I was at Fetch
Robotics. Since leaving Fetch, I’ve lost 85 pounds and am probably in the best shape
of my life - and know I could have been a much better leader and mentor at Fetch
if I had not been burnt down most of the time.
What About Those New Faces?
If you are relatively new to ROS or robotics, you’re not alone - the community is still
growing fast. I had a number of people at both MoveItCon and ROSCon ask about what
they should be studying or learning. My answer evolved a bunch over the course of the
week - here’s what I landed on:
- Find some really good mentors. ROS, and robotics in general, moves quicker than most
university programs can evolve. I’ve been fortunate to have some really great
mentors throughout my career, it is probably the biggest benefit from my
Willow Garage days.
- Contribute some open source. Help out an existing project, or even find something that
is missing and go make it exist. At Cobalt Robotics, I encouraged my younger colleagues
to get involved and in addition to various bug fixes to ROS packages, they have also
published some pretty cool work - including an
image assembler for Livox lasers and
AR visualization of what your robot sees.
We Are So Back
I cannot even count how many people I talked to who have moved back to the greater
Boston area, or even the East Coast in general. Further, so many of them talking about
work-life balance. I really want to organize a “ROSCon In The Woods” next summer where we
just go for a hike and have a BBQ in like southern New Hampshire. Drop me a message if
you’d be interested in such a thing.
The Elephant In The Room
Finally, at ROSCon there was the elephant in the room - the acquisition of Open Robotics
by Intrinsic. Not much has really changed in how ROS is operating since the acquisition,
but there were still certainly discussions of “what if the level of support and funding goes
down?”.
We in the ROS Community can’t actually do anything about that - so instead we should focus
on what we can do. Having a large open source project so largely maintained and funded by a
single organization is never great - just look at the struggle after the demise of Willow
Garage. Instead of worrying about what might happen, this is a great opportunity to
convince whomever you work for to contribute more to ROS, with both developer time and
money. Everyone can be an advocate for open source robotics software.