09 Apr 2020
calibration
national-robotics-week
robots
ros
This is day 5 of my National Robotics Week blog marathon.
See the full set of posts here.
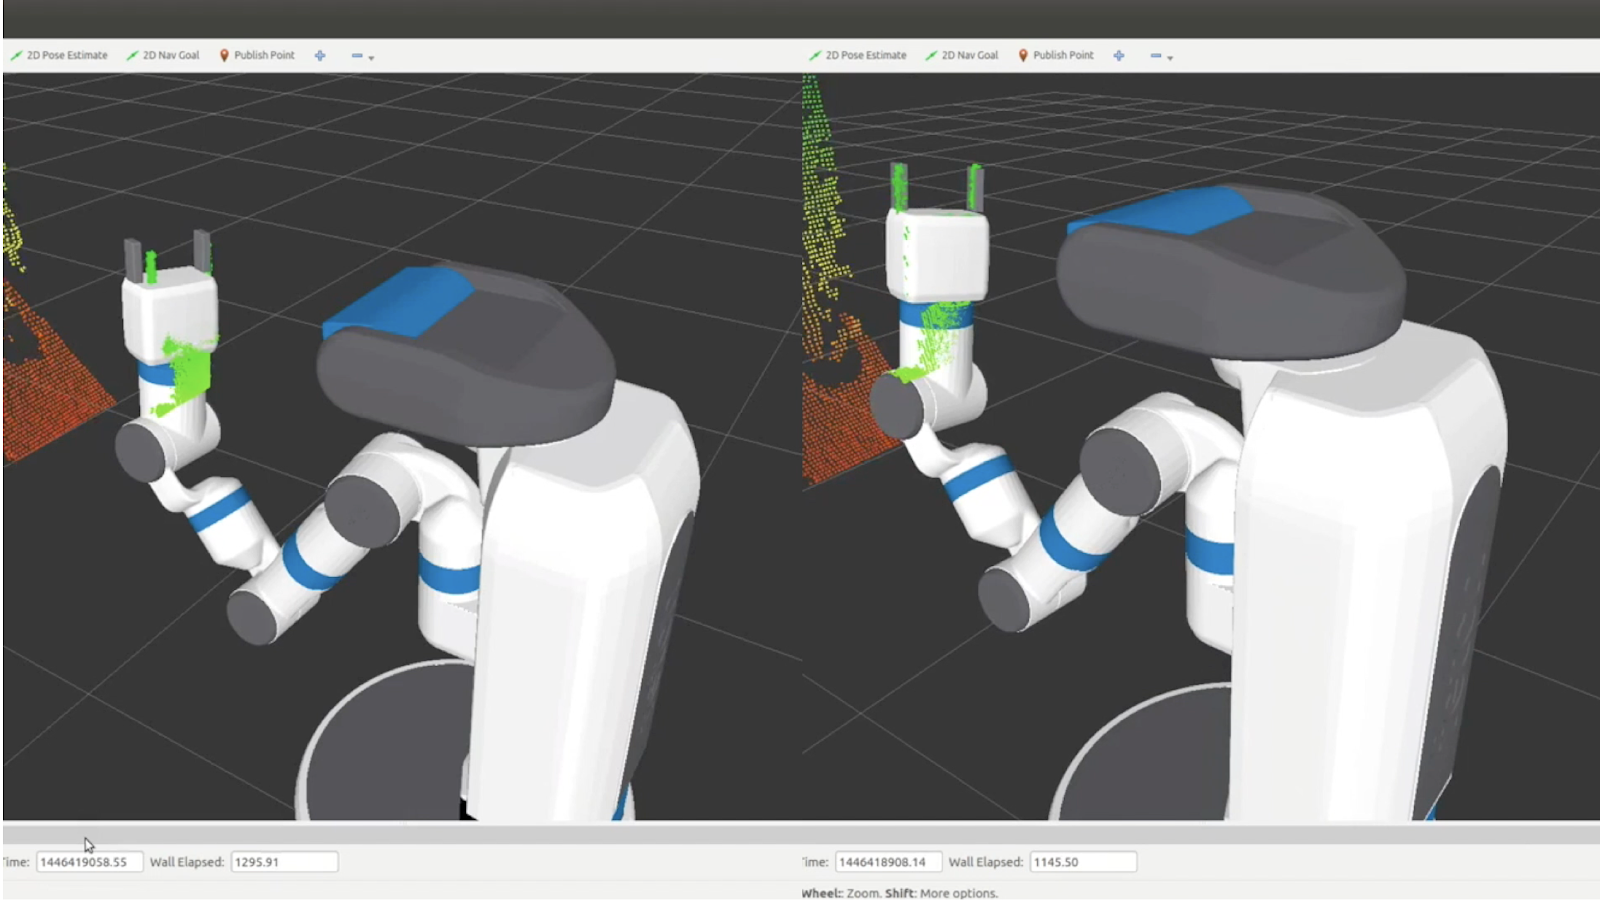 Uncalibrated vs. Calibrated
Calibration is an essential step in most robotics applications. Robots have many things that need to be calibrated:
- Camera intrinsics - basically determining the parameters for the pinhole camera model. On some
RGBD (3d) cameras, this also involves estimating other parameters using in their projections. This
is usually handled by exporting YAML files that are loaded by the drivers and broadcast on the
device's camera_info topic.
- Camera extrinsics - where the camera is located. This often involves updating the URDF to properly
place the camera frame.
- Joint offsets - small errors in the zero position of a joint can cause huge displacement in where
the arm actually ends up. This is usually handled by a "calibration_rising" flag in the URDF.
- Wheel rollout - for good odometry, you need to know how far you really have travelled. If your
wheels wear down over time, that has to be taken into account.
- Track width - on differential-drive robots, the distance between in your drive wheels is an
essential value to know for good odometry when turning.
- IMU - when fusing wheel-based odometry with a gyro, you want to make sure that the scale of the
gyro values is correct. The gyro bias is usually estimated online by the drivers, rather than given
a one-time calibration. Magnetometers in an IMU also need to be calibrated.
My robot_calibration package can do all of these except wheel rollout and magnetometer calibration
(although the magnetometer calibration will be coming soon).
Evolution of ROS Calibration Packages
There are actually quite a few packages out there for calibrating ROS-based robots. The first package
was probably
pr2_calibration developed at
Willow Garage. While the code inside this package isn't all that well documented, there is a paper
describing the details of how it works:
Calibrating a multi-arm
multi-sensor robot: A Bundle Adjustment Approach.
In basic terms
pr2_calibration works by putting checkerboards in the robots grippers, moving
the arms and head to a large number of poses, and then estimating various offsets which minimize the
reprojection errors through the two different chains (we can estimate where the checkerboard points
are through its connection with the arm versus what the camera sees). Nearly all of the available
calibration packages today rely on similar strategies.
One of the earliest robot-agnostic packages would be
calibration. One of my last
projects at Willow Garage before joining their hardware development team was to make pr2_calibration
generic, the result of this effort is the
calibration package. The downside of both this
package and
pr2_calibration is that they are horribly slow. For the PR2, we needed many,
many samples - getting all those samples often took 25 minutes or more. The optimizer that ran
over the data was also slow - adding another 20 minutes. Sadly, even after 45 minutes, the
calibration failed quite often. At the peak of Willow Garage, when we often had 20+ summer
interns in addition to our large staff, typically only 2-3 of our 10 robots were calibrated
well enough to actually use for grasping.
After Willow Garage, I tried a new approach using Google's Ceres solver to rebuild a new calibration
system. The result was the open source
robot_calibration package.
This package is used today on the Fetch robot and others.
What robot_calibration Can Do
The
robot_calibration package is really intended be an all-inclusive calibration system.
Currently, it mainly supports 3d sensors. It does take some time to setup for each robot since the
system is so broad - I'm hoping to eventually create a wizard/GUI like the MoveIt Setup Assistant
to handle this.
There are two basic steps to calibrating any robot with
robot_calibration: first we capture
a set of data which mainly includes point clouds from our sensors, joint_states data of our robot
pose, and some TF data. Then we do the actual calibration step by running that data through our
optimizer to generate corrections to our URDF, and also possibly our camera intrinsics.
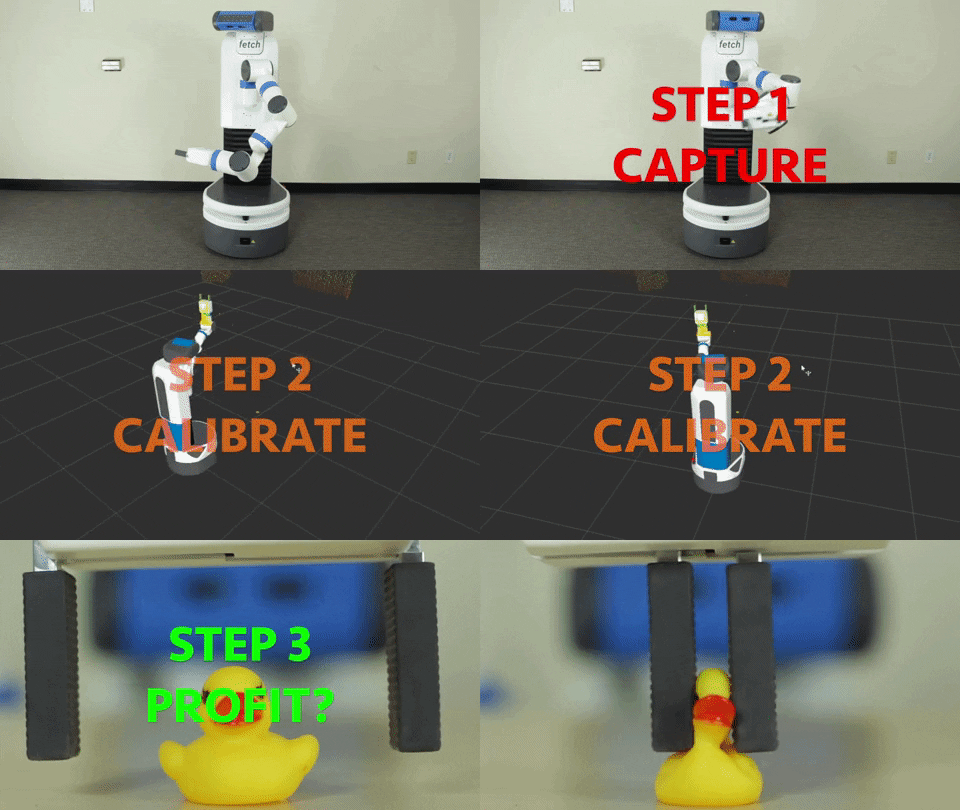
One of the major benefits of the system is the reliability and speed. On the
Fetch
robot, we only needed to capture 100 poses of the arm/head to calibrate the system. This takes only 8
minutes, and the calibration step typically takes less than a minute. One of my interns, Niharika Arora,
ran a series of experiments in which we reduce the number of poses down to 25, meaning that capture and
calibration took only three minutes - with a less than 1% failure rate. Niharika gave a talk on
robot_calibration at ROSCon 2016 and you see the video
here.
We also put together a paper (that was sadly not accepted to ICRA 2016) which contains more details
on those experiments and how the system works
[
PDF].
In addition to the standard checkerboard targets,
robot_calibration also works with LED-based
calibration targets. The four LEDs in the gripper flash a pattern allowing the robot to automatically
register the location of the gripper:
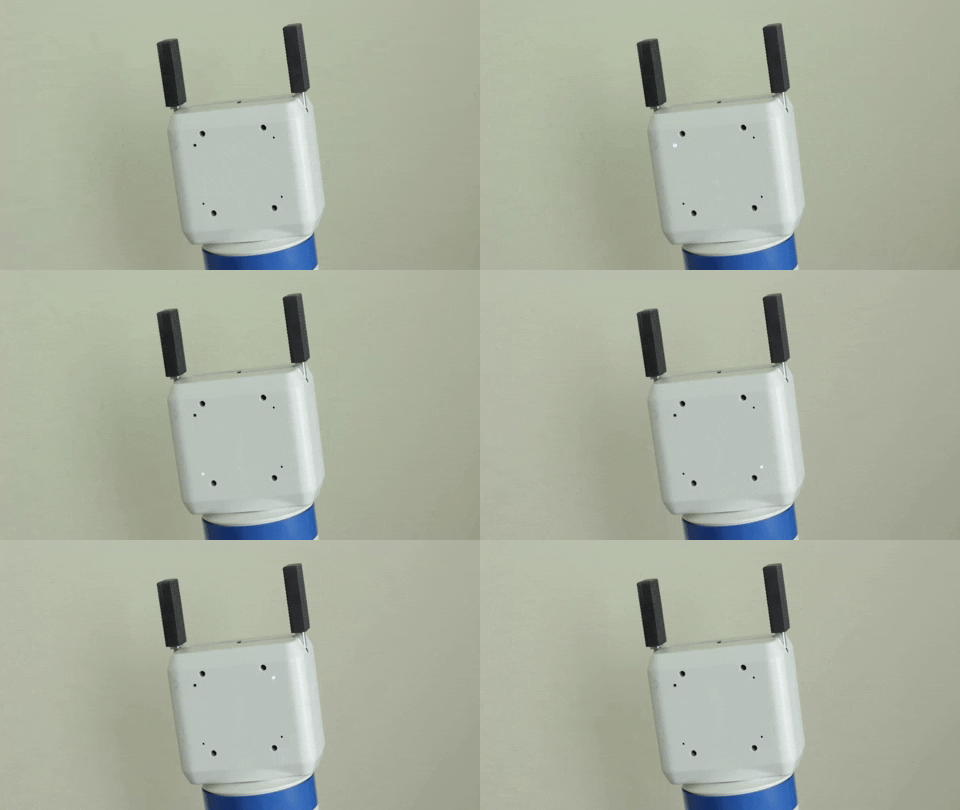 LED-based calibration target.
One of the coolest features of
robot_calibration is that it is very accurate at determining
joint zero angles. Because of this, we did not need fancy jigs or precision machined endstops to set
the zero positions of the arm. Technicians can just eye the zero angle and then let calibration do
the rest.
There is quite a bit of documentation in the
README for
robot_calibration.
Alternatives
I fully realize that
robot_calibration isn't for everyone. If you've got an industrial
arm that requires no calibration and just want to align a single sensor to it, there are probably
simpler options.
08 Apr 2020
blast-from-the-past
national-robotics-week
robots
ros
ubr1
This is day 4 of my National Robotics Week
blog marathon - it’s halfway over!
In 2013, Unbounded Robotics was the last spin-off from Willow Garage. Our four person team set out to
build a new robotics platform for the research and development community. The robot would cost a
fraction of what the Willow Garage PR2 cost. We did build three robots and demo them at a number of
events, but Unbounded eventually ran out of money and was unable to secure further funding. In the
summer of 2014 the company shut down.
I wasn’t really blogging during this whole time because I was really busy when things were going well,
and then I didn’t really want to talk about it while things were going downhill. The whole affair is
now quite a few years ago, so here we go. First, a picture of our little robot friend:
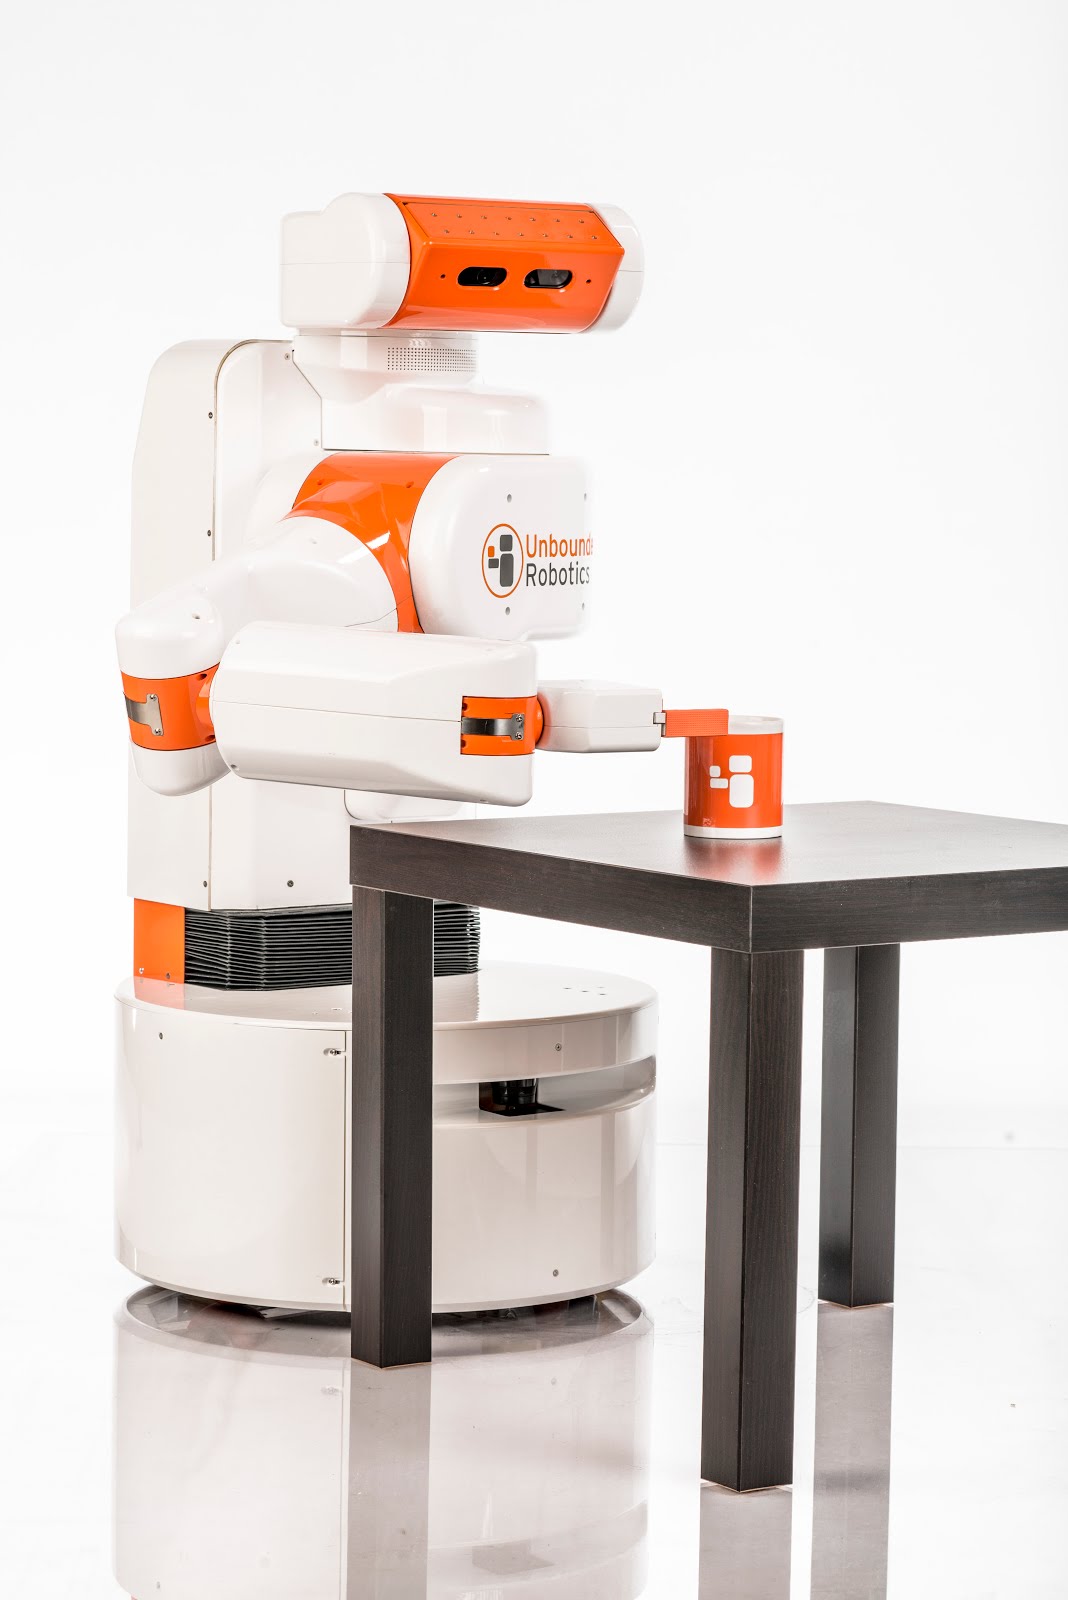 UBR-1 by Unbounded Robotics
The robot had a differential drive base, since that is really the only cost-effective style of robot
base out there. It used an interesting 10:1 worm-gear brushless motor, similar to what had been in the
PlatformBot
our team had previously designed at Willow Garage. The brushless motors were really quite efficient and
the whole drive was super quiet, but the worm gear was terribly inefficient (more on that below).
The base was about 20” in diameter - which made the robot much more maneuverable than the 26” square
footprint of the PR2, even though PR2 had holonomic drive.
The 7-DOF arm had similar kinematics to the PR2 robot, but tossed the counterbalancing for simplicity,
lower cost and weight reduction. A parallel jaw gripper replaced the very complex gripper used in the
PR2. A torso lift motor allowed the robot to remain quite short during navigation but rise to interact
with items at table height - it was a little short for typical counter-top heights but still had a
decent workspace if the items weren’t too far back on the countertop.
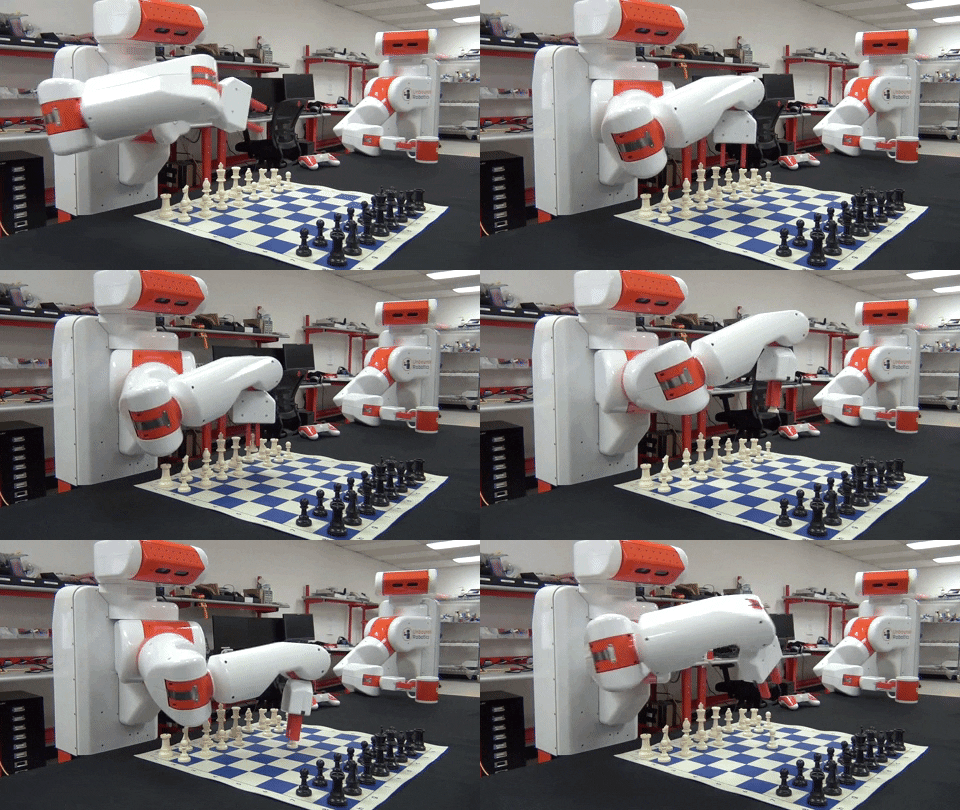
One of the first demos I set up on the UBR-1 was my chess playing demo:
UBR-1 Software
As with everything that came out of Willow Garage, UBR-1 used the Robot Operating System (ROS).
You can still download the preview repository
for the UBR-1 which included simulation with navigation and grasping demos. As with the ROS legacy of
Willow Garage, the open source software released by Unbounded Robotics continues to live on to this day.
My simple_grasping package is an improved
and robot-agnostic version of some of the grasping demos we created at Unbounded (which were actually
based on some of my earlier grasping demos created for my Maxwell robot). A number of improvements and
bug fixes for ROS Navigation and other packages also came out during this time since I was a primary
maintainer of these packages in the dark days following Willow’s demise.
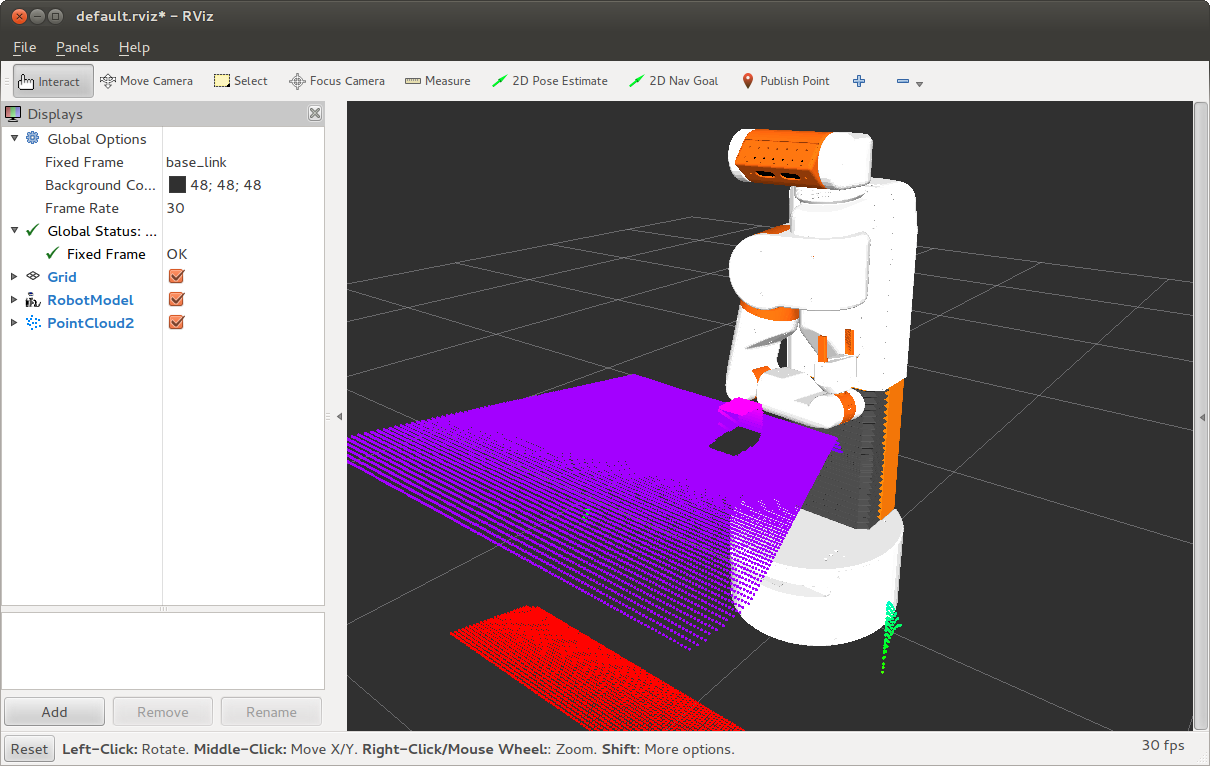 UBR-1 in Gazebo Simulation
Power Usage and Battery Life
Power usage reductions and battery life increases were some of the biggest improvements in the UBR-1
versus the PR2. The PR2 was designed in 2010 and used two computers, each with 24Gb of RAM and 2
quad-core Intel L5520 Nehalem processors. The Nehalem was the first generation of Intel Core processors.
The PR2 batteries were specified to have 1.3kWh of stored energy, but only gave about two hours of
runtime, regardless of whether the robot was even doing anything with the motors. There were other
culprits besides the computers, in particular, the 33 motor controller boards each had two ethernet
PHYs accounting about 60W of power draw. But the computers were the main power draw. This was made
worse by the computers being powered by isolated DC-DC converters that were only about 70% efficient.
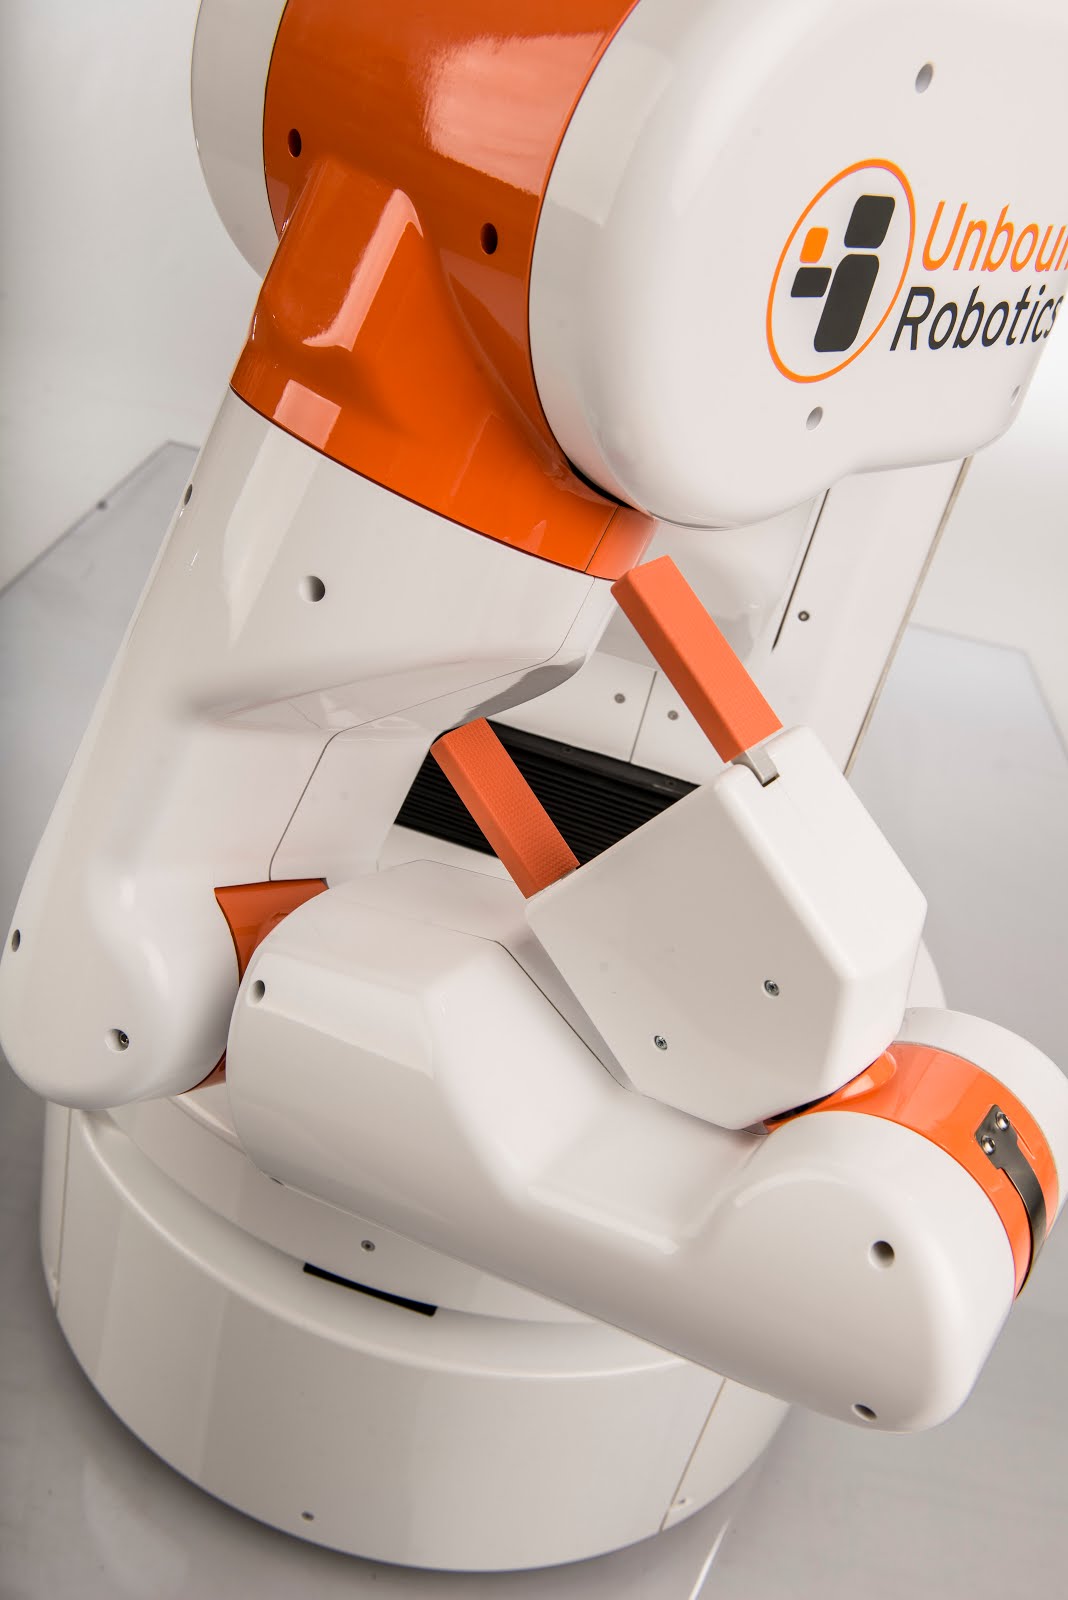 The UBR-1 arm.
The UBR-1 used a 4th generation Intel Core processor. The gains in just four years were quite
impressive: the computer drew only 30-35W of power, but we were able to run similar demos of navigation
and manipulation that ran on the PR2. Based on the Intel documentation, a large part of that was the
75% power reduction for the same performance from the first to fourth generation chips. A smaller
contributor was improvements in the underlying algorithms and code base.
For dynamic movements, the UBR-1 arm was also significantly more power efficient than the PR2, since
it weighed less than half as much. Gravity compensation of the 25 lb arm required only about 15W in
the worst configurations - this could have been lowered with higher gearing, but would have had adverse
effects on the efficiency when moving and might have jeopardized the back-drivability.
The base motors were still highly inefficient - UBR-1 needed about 250W to drive around on carpet.
Hub motors have become pretty common in the years since and can improve the efficiency of the drivetrain
from a measly 35% to upwards of 85%.
Robot Evolution
Processors have gotten more efficient in the years since UBR-1 - but their prices have pretty much
stopped dropping. Motors haven’t really gotten any cheaper since the days of the PR2, although the
controls have gotten more sophisticated. Sensors also really haven’t gotten much cheaper or better
since the introduction of the Microsoft Kinect. While there has been a lot of money flowing into robotics
over the past decade, we haven’t seen the predicted massive uptake in robots. Why is that?
One of my theories around robotics is that we go through a repeated cycle of “hardware limited” and
“software limited” phases. A hardware innovation allows an increased capability and it takes some time
for the software to catch up. At some point the software innovation has increased to a point where the
hardware is now the limiting factor. New hardware innovations come out to address this, and the
process repeats.
Before ROS, we were definitely software-limited. There were a number of fairly mechanically sophisticated
robots in research labs all over the planet, but there were not widely-accepted common frameworks with
which to share software. PhD students would re-invent the wheel for the first several years of their
work before contributing something new, but then have no way to pass that new innovative code on. ROS
changed this significantly.
On the hardware side, there were very few common platforms before the PR2. Even the Mobile Robots
Pioneer wasn’t exactly a “common platform” because everyone installed different sensors on them,
so code wasn’t very portable. The introduction of PR2 going to a number of top universities, combined
with the Willow Garage intern program, really kickstarted the use of a common platform. The
introduction of the Microsoft Kinect and the advent of low-cost depth sensors also triggered a
huge leap forward in robot capability. I found it amusing at the time to see the several thousand
dollar stereo camera suite on the PR2 pretty much replaced (and outperformed) by a single $150 Kinect.
For a few years there was a huge explosion in the software being passed around, and then we were
hardware-limited again because the PR2 was too expensive for wide adoption. While the UBR-1 never
got to fill that void, there are now a number of lower-cost platforms available with pretty
solid capabilities. We’re back to software-limited.
So why are robots still software limited? The world is a challenging environment. The open source
robotics community has made great strides in motion planning, motor control, and navigation. But
perception is still really hard. Today we’re mainly seeing commercially deployed robots making
inroads in industries where the environment is pretty well defined - warehouses and office spaces,
for instance. In these environments we can generally get away with just knowing that an “obstacle”
is somewhere - our robot doesn’t really care what the obstacle is. We’ve got pretty good sensors -
although they’re still a little pricey - but we generally lack the software to really leverage them.
Even in the ROS ecosystem, there’s huge amounts of hardware drivers and motion planning software
(ROS Navigation, MoveIt, OMPL, SBPL, the list goes on), but very little perception code. Perception
is still very dependent on the exact task you’re doing, there just isn’t a lot of “generic”
perception out there.
There is a certain magic in finding applications where robots can offer enough value to the customer
at the right price point. Today, those tend to be applications where the robot needs limited
understanding of the environment. I look forward to what the applications of tomorrow might be.
07 Apr 2020
national-robotics-week
ros
This is day 3 of my 2020 National Robotics Week blog marathon!
About two years ago I created a little package called
code_coverage. This package is a bit
of CMake which makes it easier to run coverage testing on your ROS packages. Initially it only
supported C++, but recently it has been expanded to cover Python code as well.
What is Code Coverage?
Before I get into how to use the code_coverage package, let’s discuss what coverage
testing is all about. We all know it is important to have tests for your code so that it does
not break as you implement new features and inevitably refactor code. Coverage testing tells
you what parts of your code your tests actually test. This can help you find branch paths or
even entire modules of the code that are not properly tested. It can also help you know if new
code is actually getting tested.
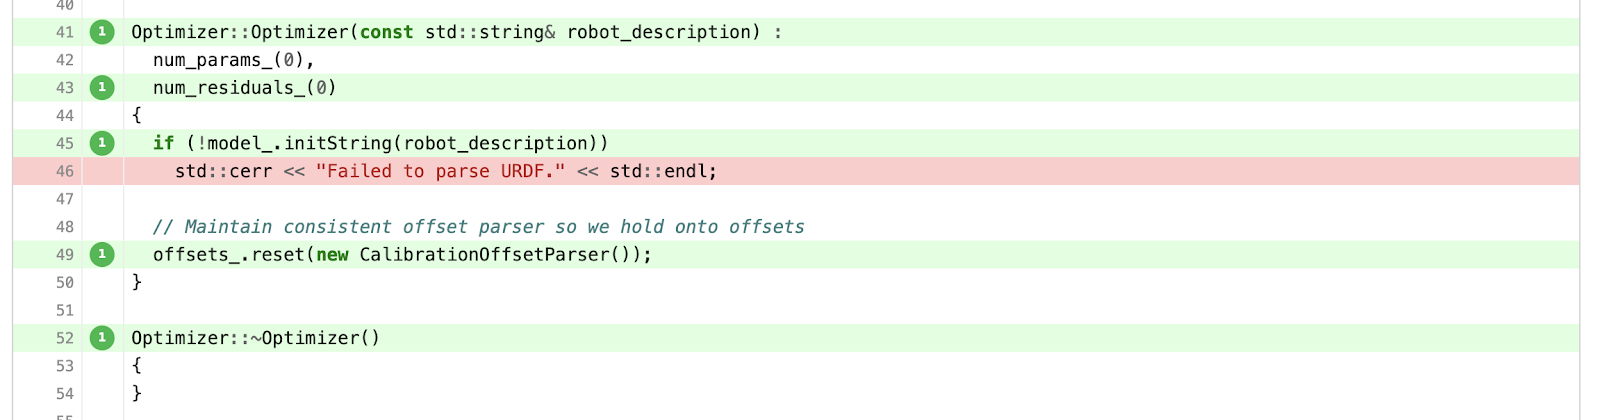
The output of a coverage test is generally some really nice webpages that show you line-by-line
what code is getting executed during the test:
Using code_coverage for C++
We will start by discussing the usage of code_coverage with C++ code first, because it is
actually quite a bit simpler. C++ coverage can be done almost entirely in CMake.
First, update your package.xml to have a test_depend on
code_coverage package.
Next, we need to update two places in the CMakeLists.txt file. The first change
should be right after you call to catkin_package. The second change is where you define your
test targets. You need to define a new target, which we will typically call
{package_name}_coverage_report
# After catkin_package()

if(CATKIN_ENABLE_TESTING AND ENABLE_COVERAGE_TESTING)
  find_package(code_coverage REQUIRED)
  # Add compiler flags for coverage instrumentation before defining any targets
  APPEND_COVERAGE_COMPILER_FLAGS()
endif()

# Add your targets here

if (CATKIN_ENABLE_TESTING)
  # Add your tests here

  # Create a target ${PROJECT_NAME}_coverage_report
  if(ENABLE_COVERAGE_TESTING)
    set(COVERAGE_EXCLUDES "*/${PROJECT_NAME}/test*" "*/${PROJECT_NAME}/other_dir_i_dont_care_about*")
    add_code_coverage(
      NAME ${PROJECT_NAME}_coverage_report
      DEPENDENCIES tests
    )
  endif()
endif()
That’s the configuration needed. Now we can compile the code (with coverage turned on)
and run the coverage report (which in turn will run the tests):
catkin_make -DENABLE_COVERAGE_TESTING=ON -DCMAKE_BUILD_TYPE=Debug PACKAGE_NAME_coverage_report
You can find these same instructions (and how to use catkin tools) in the
code_coverage README.
Using code_coverage for Python
Python unit tests will automatically get coverage turned on just with the CMake configuration
shown above, but Python-based rostests (those that are launched in a launch file) need some
extra configuration.
First, we need to turn on coverage testing in each node using the launch-prefix. You can decide
on a node-by-node basis which nodes should actually generate coverage information:
<launch>

    <!-- Add an argument to the launch file to turn on coverage -->
    <arg name="coverage" default="false"/>

    <!-- This fancy line forces nodes to generate coverage -->
    <arg name="pythontest_launch_prefix" value="$(eval 'python-coverage run -p' if arg('coverage') else '')"/>

    <!-- This node will NOT generate coverage information -->
    <node pkg="example_pkg" name="publisher_node" type="publisher_node.py" />

    <!-- But this node WILL generate coverage -->
    <node pkg="example_pkg" name="subscriber_node" type="subscriber_node.py"
          launch-prefix="$(arg pythontest_launch_prefix)" />

    <!-- The test can also generate coverage information if you include the launch-prefix -->
    <test time-limit="10" test-name="sample_rostest" pkg="example_pkg" type="sample_rostest.py"
          launch-prefix="$(arg pythontest_launch_prefix)" />

</launch>
Then we turn on coverage by adding the argument in our CMakeLists.txt:
add_rostest(example_rostest.test ARGS coverage:=ENABLE_COVERAGE_TESTING)
You can find this full Python example from my co-worker Survy Vaish on
GitHub.
Using codecov.io For Visualization
codecov.io is a cloud-based solution for visualizing the output of your coverage testing.
It can combine all of the reports from individual packages, as well as the C++ and Python
reports into some nice graphs and track results over multiple commits:
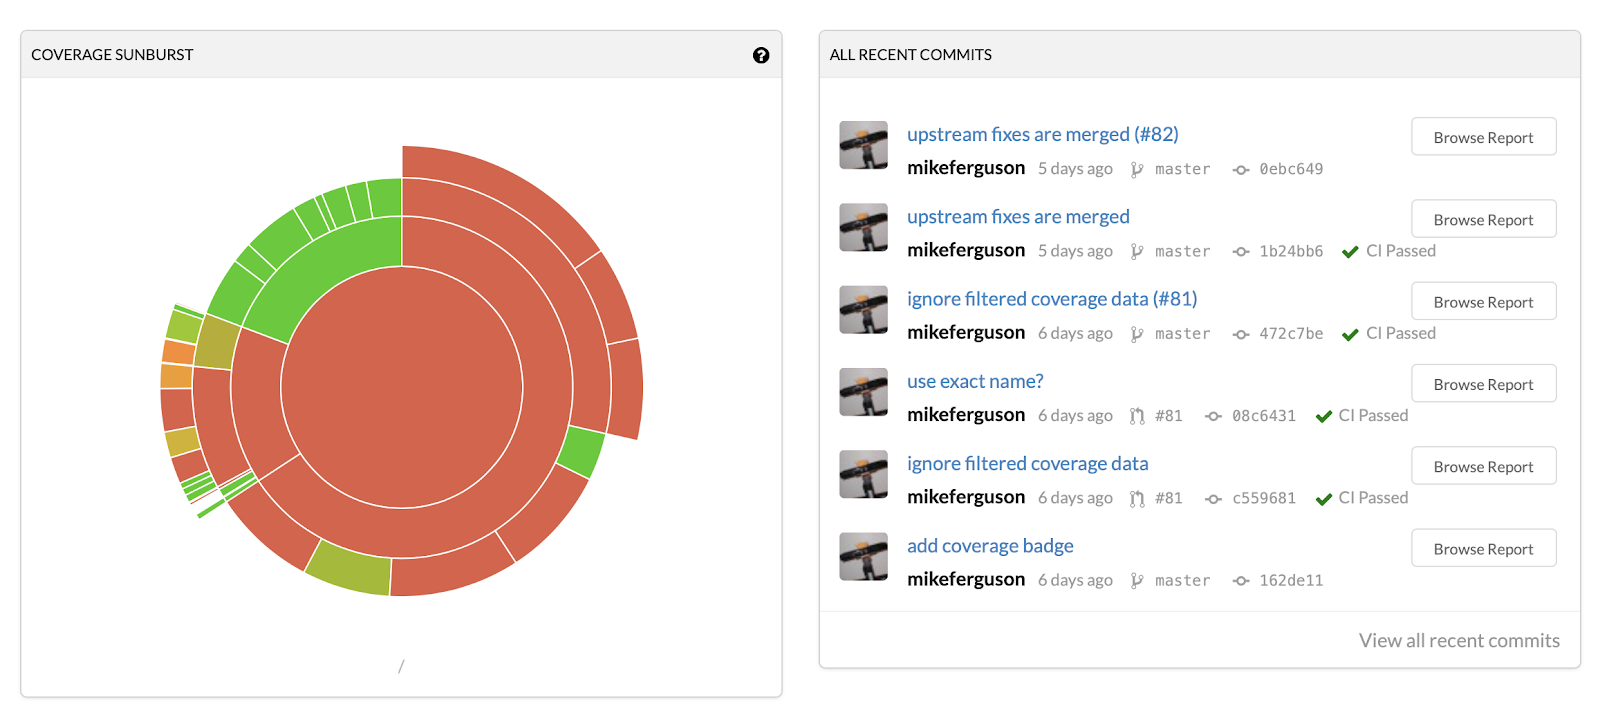 codecov.io dashboard for robot_calibration
A Full Working Example
The robot_calibration package use
code_coverage, codecov.io, and Travis-CI to run code coverage testing on every pull
request and commit to master branch. It uses the popular
industrial-ci package as
the base line and then the following changes are made:
- I set the CMAKE_ARGS in the travis.yml so that coverage is turned on, and the build type is debug.
- I created a .coverage.sh script which runs as the AFTER_SCRIPT in Industrial-CI. This script runs
the coverage report target and then calls the codecov.io
bash uploader.
- Since Industrial-CI runs in a docker, I introduced a .codecov.sh script which exports the
required environment variables into the docker. This uses the
env script from codecov.io.