05 Apr 2020
ros
national-robotics-week
maxwell
robots
It's National Robotics Week! But you should definitely #StayAtHome, so there are
no in-person events this week. I already had this (and several other posts) nearly
done, so I'm aiming to post something every day this week.
Recently I updated Maxwell to use the PS4 controller. It is not the easiest thing to
setup, and I found lots of misinformation out there that either never worked, or no
longer works. So here is how I now setup PS4 controllers on Ubuntu Bionic (18.04).
These instructions require no special packages to be installed, we're using the default
bluetooth built into the Linux kernel, which should also mean that other bluetooth
stuff continues to work (unlike the older ps3_joy ROS package).
To pair the PS4 controller with the robot computer we need to start the controller in
"pairing mode". Hold down the SHARE button while pushing the POWER button. Continue
to hold both buttons until the LED starts flashing very quickly.
On the computer we will use
bluetoothctl to do three things:
- Turn on the scan - so we can find new devices. This is how we find the MAC address
of the wireless controller.
- Tell the bluetooth controller to trust the wireless controller
- Tell the bluetooth controller to pair with the wireless controller
Open a terminal on the robot computer and run the following commands that are in
RED. Replace the MAC address with the actual device found
(I've highlighted in green what the line should look like):
$ sudo bluetoothctl [NEW] Controller A0:A4:C5:CC:D1:92 velocityXYZ [default] Agent registered [bluetooth]# scan on Discovery started [CHG] Controller A0:A4:C5:CC:D1:92 Discovering: yes [NEW] Device A4:AE:11:02:78:BC Wireless Controller [bluetooth]# trust A4:AE:11:02:78:BC Changing A4:AE:11:02:78:BC trust succeeded [bluetooth]# pair A4:AE:11:02:78:BC Attempting to pair with A4:AE:11:02:78:BC [CHG] Device A4:AE:11:02:78:BC Connected: yes [CHG] Device A4:AE:11:02:78:BC UUIDs: 00001124-0000-1000-8000-00805f9b34fb [CHG] Device A4:AE:11:02:78:BC UUIDs: 00001200-0000-1000-8000-00805f9b34fb [CHG] Device A4:AE:11:02:78:BC ServicesResolved: yes [CHG] Device A4:AE:11:02:78:BC Paired: yes Pairing successful [bluetooth]# exit |
When complete, the PS4 LED should go solid and turn a deeper blue color. You should only have to
do this once, and the controller will remain paired until you pair it with another computer.
Once you've got the PS4 controller paired, you'll find out the button mapping is just a little different
form the PS3:
- The common "deadman" button on the upper corner of the joystick (labeled "L1") is index 4
instead of 10.
- The joystick axis have changed a bit, I had to change axis_linear from 4 to 3.
- It is probably a good idea to set the autorepeat_rate on the joy node. This prevents
stuttering publishing (and movement).
Here's the
changes
I made to Maxwell to update from the PS3 to the PS4 controller. I use a custom node for converting
Joy messages into Twist messages. If you're using the popular
teleop_twist_joy package,
you'll be using
enable_button parameter instead of
axis_deadman.
01 Apr 2020
maxwell
robots
ros
It has been over 5 years since I last posted on this blog - but now seems like a great time
to start posting things again!
We will start with an update on Maxwell, my longest running robot, which originally started
as my Masters project at SUNY Albany. He's 9 years old now, although the only original parts
are the laser cut base, the drive motors, drive wheels, and the the neck:
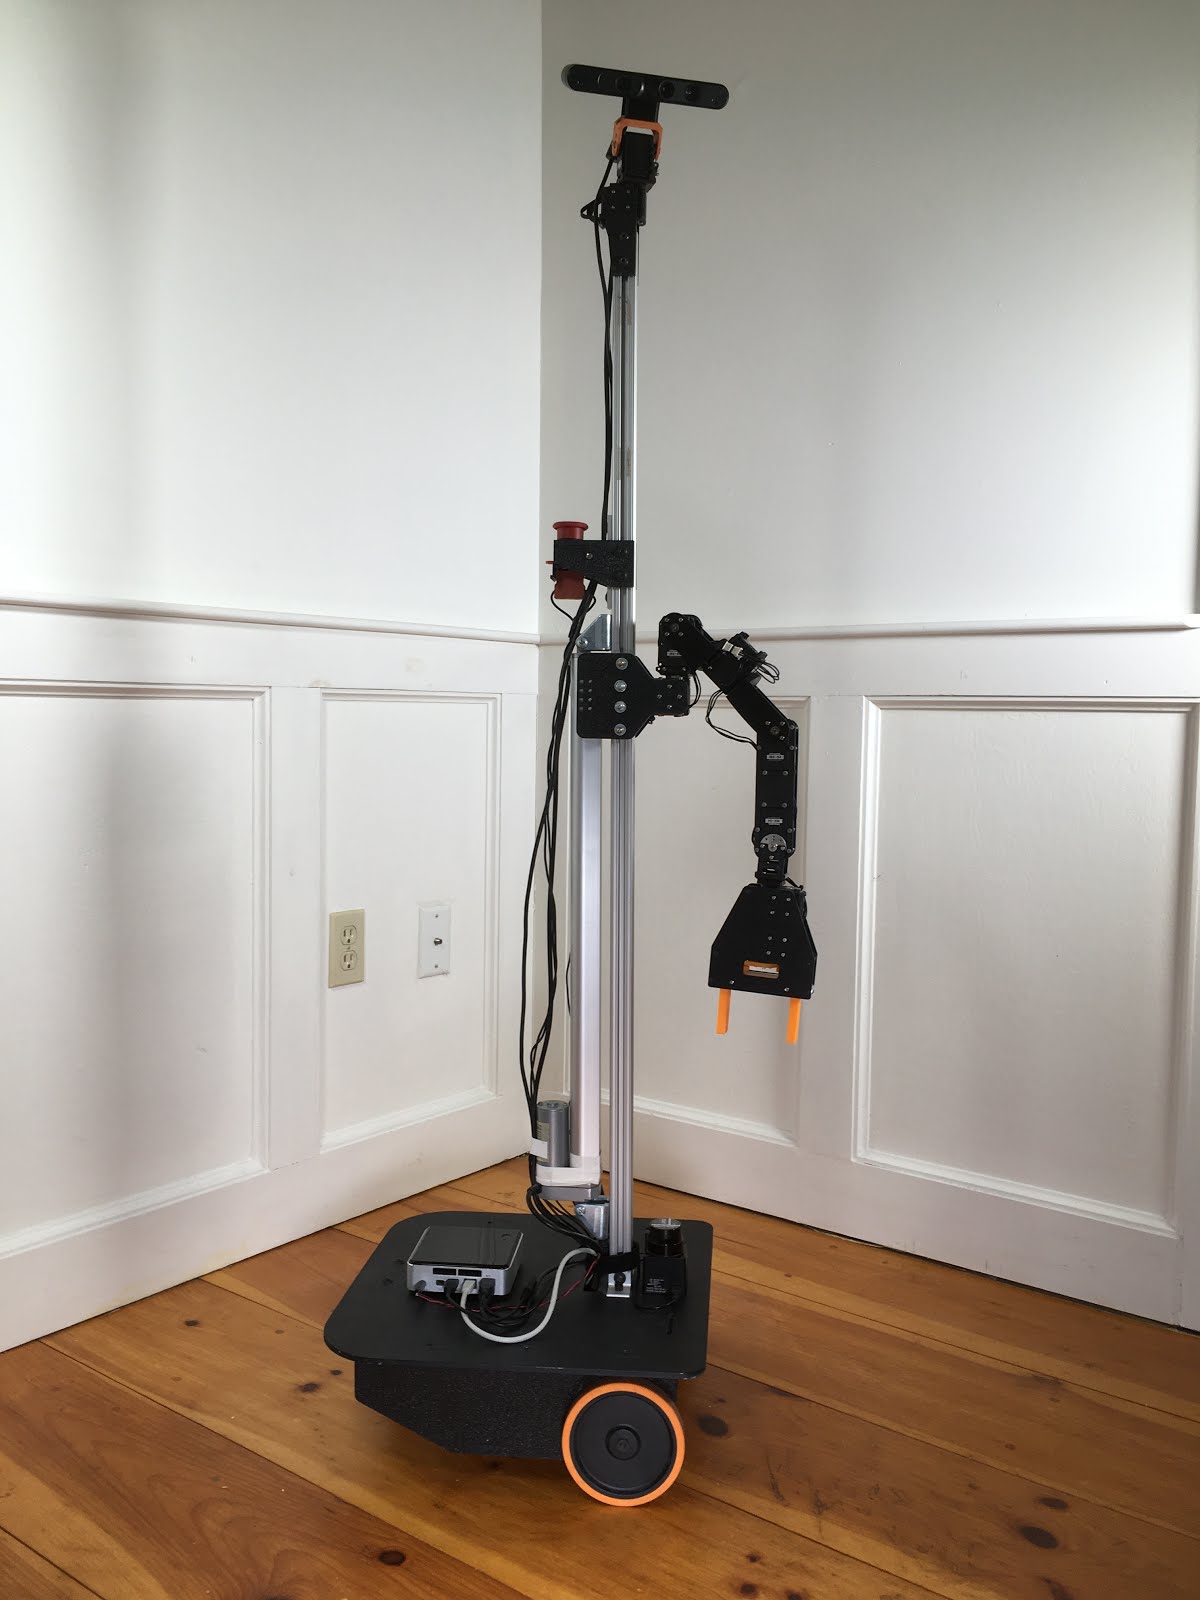
I don't expect there are many hobby robots out there with such a long lifespan. Here is a
summary of Maxwell's evolution:
- January 2011 - Maxwell is created
with an Arbotix, a series of EX-106 and RX-64 servos, Hokuyo URG-04LX-UG01 laser, a Kinect, and a massive Dell laptop.
- March 2011 - Maxwell gets an
Emergency Stop.
- August 2011 - Maxwell wins the AAAI Small Scale Manipulation Challenge.
- December 2011 - Maxwell
gets a vertical lift so he can reach the ground and the table. Around the same time, the camera got upgraded to an
Asus Xtion.
- Summer 2012 - Maxwell gets upgraded to a MX series servos. I also wrote a
three part article about this in SERVO
magazine.
- Summer 2013 - Maxwell gets upgraded to use MoveIt.
- Fall 2014 - Maxwell gets upgraded to and
Intel NUC and the Etherbotix controller,
an ARM-based, Ethernet-connected replacement for the ArbotiX I was originally using. I also created lots of
documentation so that Alan
Downing from HBRC could build a Maxwell clone (ROSwell)
- Spring 2018 - Maxwell gets a parallel-jaw gripper (more on this below).
- Spring 2020 - lots of updates.
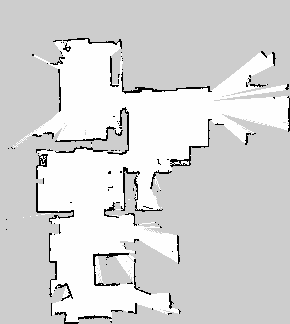
The first of the new updates is migrating Maxwell to ROS Melodic. The drivers are all updated, and all the warnings
have been fixed. I've built a map of the house here in NH (and
fixed a major bug in slam_karto in the process):
I've also updated Maxwell to the PS4 controller, since the PS3 doesn't work so great in newer versions of Linux
(this will be the subject of a later post).
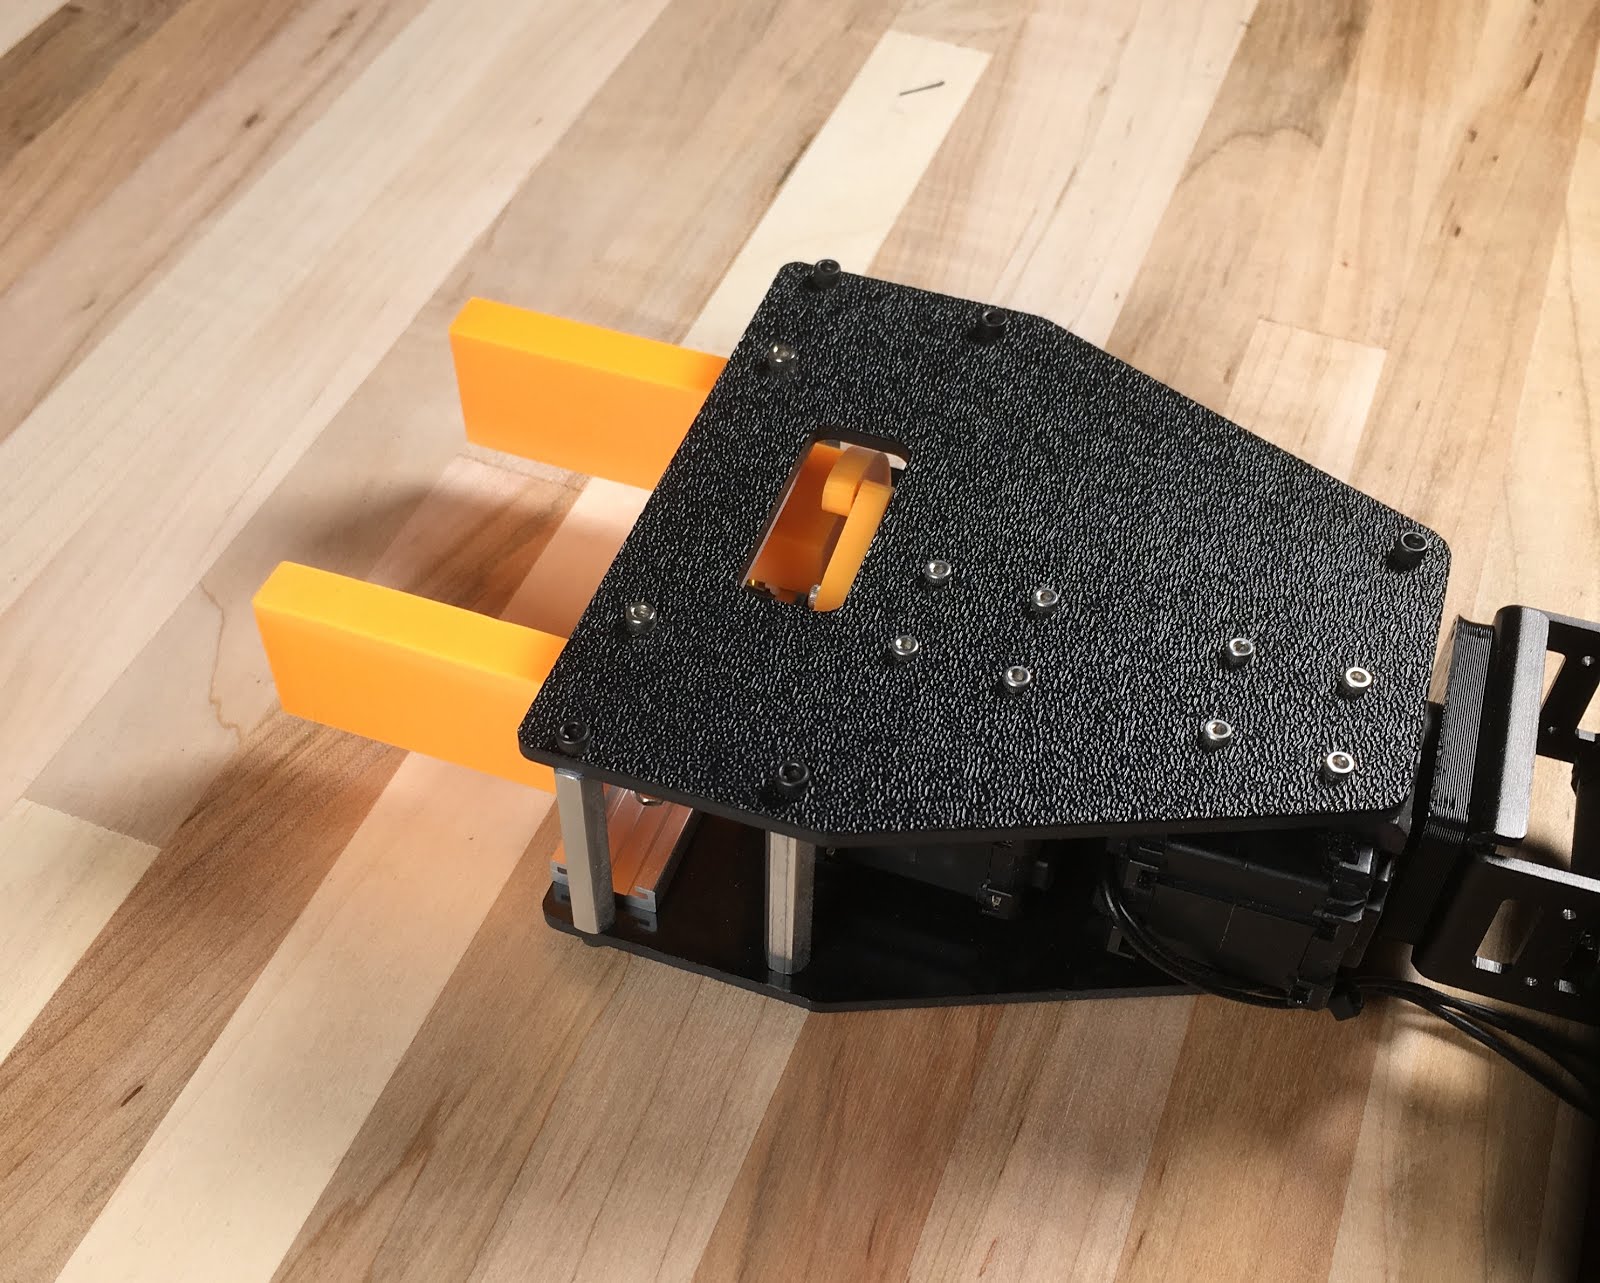
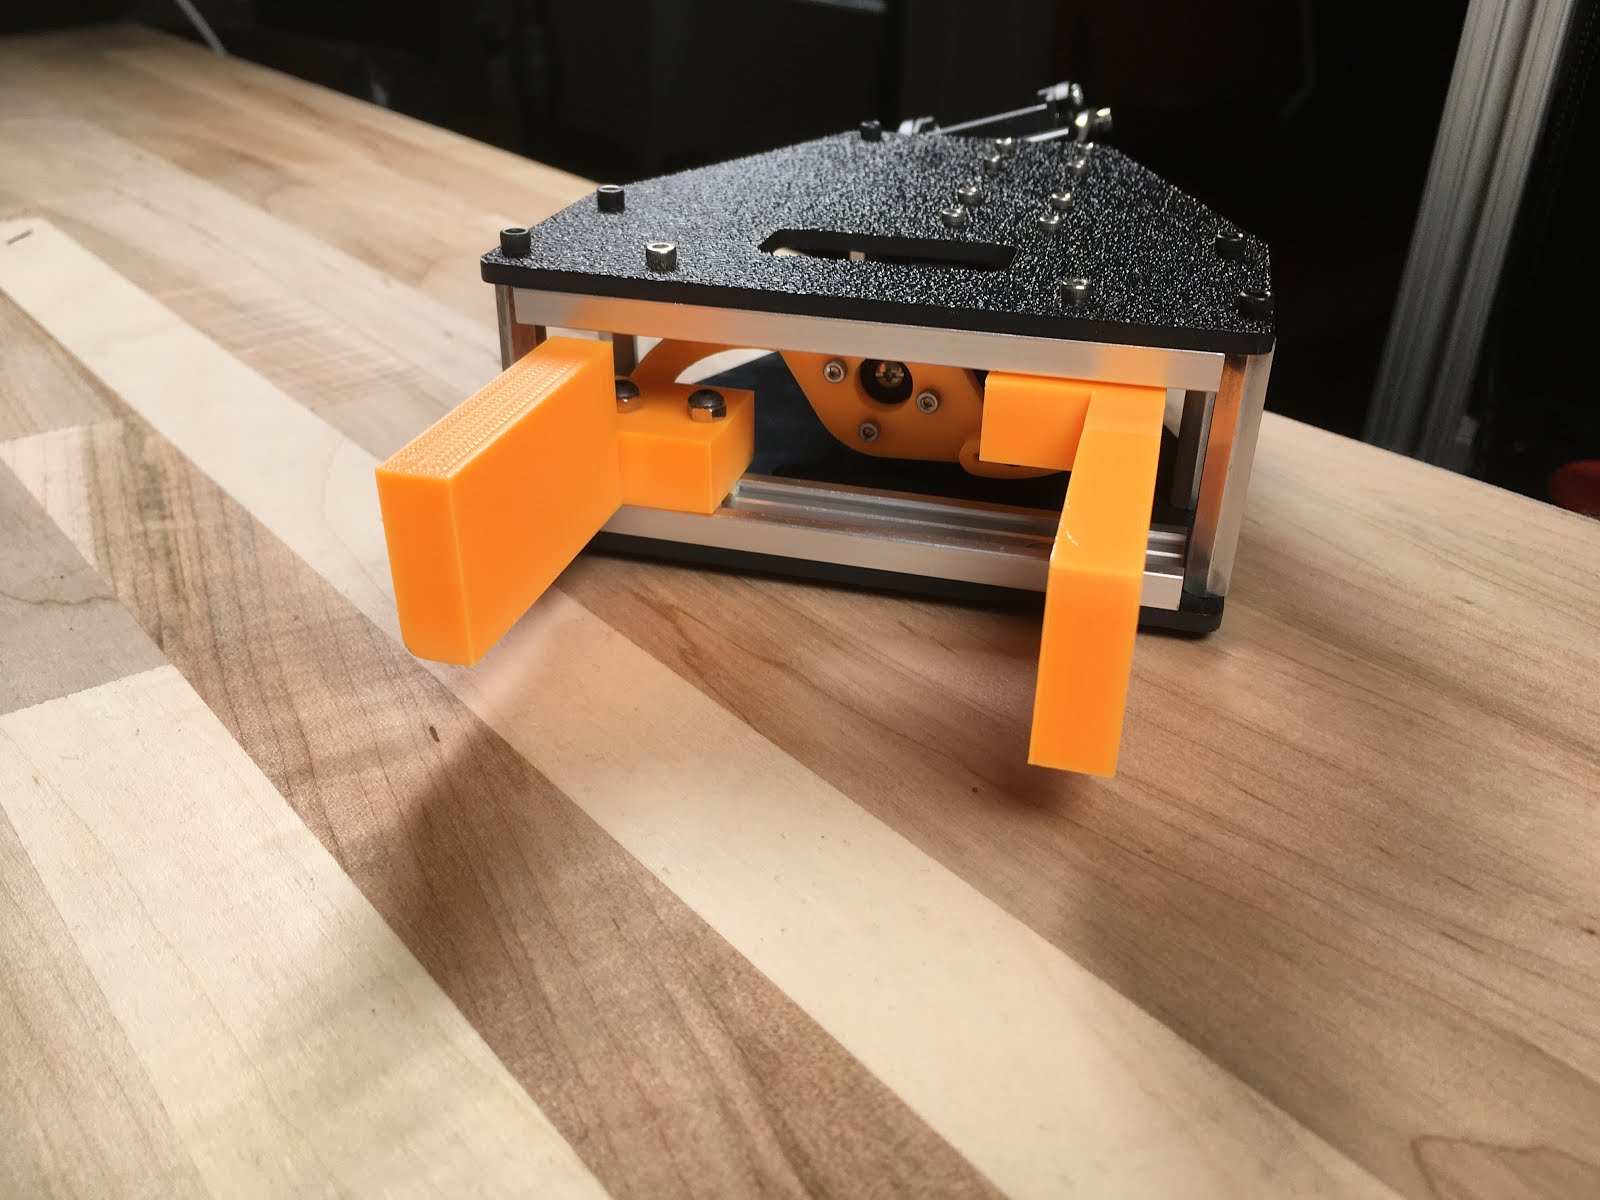
While the parallel-jaw gripper was physically installed on Maxwell some time ago, and the URDF had been updated,
I never actually finished the software to control the gripper -- that's the project for later this week. In the
meantime, here are some close up shots of the gripper:
21 Sep 2014
ros
Below are 5 steps to getting the most out of ROS Answers, and hopefully giving the most
back to the community in the process:
1. Don't be afraid to ask a question
The name of the site may be "ROS Answers", but there is no point in having answers if
there are not questions. Often I find that people comment on old questions, or post
answers to old questions, hoping to get help for a possibly related problem. Your
comments will probably be missed by anyone who did not previously participate in that
question/answer thread, and posting an answer with a question is just bad etiquette.
If you have a question, open a new question!
2. But before you ask a question, check to see if someone has already asked and answered the exact same thing!
There are over
15,000 18000* questions on ROS Answers. There is a good
chance that if you have a common problem, it has already been asked, and probably answered.
The average time between posting a question and getting answer is probably several hours,
however, if you spend just a few minutes searching the site you might find your answer
immediately.
3. If you ask a question -- try to make sure other people will be able to find it some day by adding appropriate tags.
That search thingy in #2 depends on questions being properly tagged. Adding a few (useful)
tags will both help get you an answer faster, as well as making sure that the next person
with the same question can find your question and the answer to it. "ros" is probably not
a useful tag, the name of the package, node, or command in question would be good tags.
Including tags for the specific hardware you might be using could also be useful (for
instance "kinect" or "pr2")
4. Close button is evil. Karma is good.
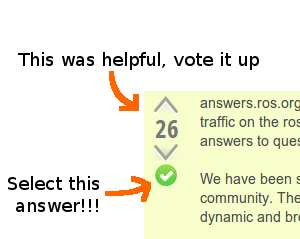
This is probably the most misunderstood aspect of ROS Answers. People frequently post a
comment saying "thanks, that works" and then click the "close" button on the question
instead of selecting an answer. Please don't do this! Instead, click the checkmark next
to the question to select the answer to your question. You can only select the answer on
questions that you asked, however, if you find an answer to someone else's question that
helps you, you can give a little Karma by clicking the "up arrow". The answer to the
right here has been upvoted 26 times -- it must be pretty good.
The answers website really depends on Karma. New users have restrictions (unable to post
links, images, etc). New users NEED Karma to become more effective users. Power users need
Karma to be able to moderate the site, like retagging those questions where people didn't
get the tags right.
5. Finally, make sure somebody can actually maybe answer your question.
Good answers require good questions. If you get an error in the console, certainly include
that exact error into the question. A summary of the error, or "I got an error" are not
substitutes for the actual error or traceback. Tells us exactly what commands you ran.
Other things you probably want to include: what ROS version, operating system, and robot
you are running -- and if you aren't running from up-to-date debs from the OSRF apt repo,
you probably want to point out how you installed ROS.
* I started writing this post a few days after the 15000th question was posted. I finished
writing it 3000 questions later....